
Table of Contents
Last Updated on: 18th July 2023, 05:54 pm
Yes, a washing machine needs to be level for several reasons. Leveling the machine ensures proper functioning and prevents issues such as excessive noise, vibrations, and potential damage to the appliance or surrounding area.
When a washing machine is not level, it can cause uneven distribution of the laundry load during the spin cycle, leading to imbalances and excessive movement. This can also affect the machine’s ability to drain properly.
| Disclaimer: As an Amazon Associate, I earn from qualifying purchases. |
Moreover, an uneven washing machine could weaken or in some cases damage the washer’s body parts.
To ensure the best performance and longevity of your washing machine, it is recommended to level it during installation and periodically check its levelness.
It’s important to understand the key points of leveling a washing machine. Let us guide you on how to level a washing machine.
How to Level a Washing Machine: A Step-by-Step Guide
Let’s take a look at the steps for leveling the washing machine:
Step 1: Prepare the Washing Machine
Make sure you’ve unplugged and emptied the washing machine. Remove any laundry or items from the drum before proceeding with the leveling process. This ensures safety and ease of access to the machine.
Step 2: Position the Level
Place the level on top of the washing machine, making sure that it is in contact with all four corners of the machine. The level should be placed horizontally across the top surface of the machine.
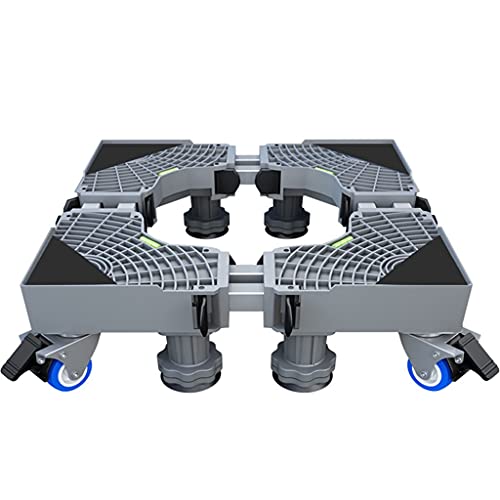
- 1. Adjustable base: The movable base can be adjusted between 16.1 inches and 26.7 inches
- 2. Long service life: It can lift the equipment up to 5.2 inches from the ground
- 3. Lock design: The rollers can also move furniture or household appliances
- 4. Large load-bearing capacity: It can hold up to 660 pounds
- 5. Black shock-proof rubber pad: The base is equipped with a black shock-proof rubber pad
Step 3: Check the Level
Observe the bubble in the level. If the bubble is not centered between the two guidelines or markers, it indicates that the washing machine is not level. The bubble should ideally be centered to ensure proper leveling.
Step 4: Adjust the Leveling Feet
Locate the leveling feet of the washing machine. These are typically adjustable legs or feet located at the bottom of the machine. Use a wrench or adjustable pliers to loosen the leveling feet.
Step 5: Level the Machine
To level the washing machine, adjust the height of each leveling foot individually. Rotate the leveling feet clockwise to raise the machine or counterclockwise to lower it. Keep an eye on the level as you make adjustments.
Step 6: Center the Bubble
Continuously check the bubble in the level while adjusting the leveling feet. Make small adjustments until the bubble is centered between the guidelines. This ensures that the washing machine is level in all directions.
Step 7: Secure the Leveling
Once the washing machine is leveled and the bubble is centered, tighten the leveling feet with the wrench or adjustable pliers. This helps secure the adjusted position and prevents the feet from moving or shifting during use. Furthermore, you could also use anti-vibration pads for washing machines to avoid any shakiness during the wash.

- The washer and dryer foot pad is made with the preferred rubber material; our anti-vibration mats are wear-proof and tear-proof
- Our washer and dryer pads prevent scrapes, scratches, or any type of damage to your floor.
- Installation is quick and easy, no special tools or skills are required
- These anti-vibration mats reduce the vibration generated by the operation of the washer or dryer
- These anti-vibration pads made of rubber have good friction, can be tight to the ground
Step 8: Test the Leveled Washing Machine
Plug in the washing machine and test it to ensure that it is now level. Run a short test cycle with a small load to observe if there are any vibrations or excessive movement. If the machine operates smoothly without any issues, it indicates successful leveling.
By following these steps, you can properly level your washing machine, ensuring optimal performance and reducing the risk of damage caused by imbalances or vibrations during operation.
What happens when a washer is unlevel?
When a washer is unlevel, it can lead to several issues that can affect its performance and potentially cause damage. Here are some of the problems that can occur when a washer is not properly leveled:
Excessive Noise and Vibrations
An unlevel washing machine can cause excessive noise and vibrations during operation. This is especially noticeable during the spin cycle when the machine rotates at high speeds.
The uneven distribution of the laundry load can cause the washer to shake or move excessively, resulting in loud noises and vibrations that can be disruptive and potentially damage nearby objects.
Imbalanced Loads
When a washer is not level, it can result in imbalanced loads. During the spin cycle, the machine is designed to evenly distribute the weight of the laundry load. However, if the washer is unlevel, it may not be able to distribute the load properly.
This can lead to imbalances within the drum, causing the washer to shake or move violently. Imbalanced loads can also prevent the washer from spinning at its intended speed, resulting in inadequate cleaning or rinsing of the laundry.
Poor Drainage
An unlevel washer may not drain properly. The drain pump relies on gravity to remove water from the machine effectively. If the washer is tilted or unlevel, water may not drain completely, leading to standing water in the drum or inefficient draining.
This can cause issues with mold or mildew growth, unpleasant odors, and potential damage to the washer’s components. For more information on washer drainage, check out other articles on the site to understand how washing machine drainage works.
Increased Wear and Tear
When a washer operates while unlevel, it puts additional stress on its internal components. The constant shaking and movement can lead to increased wear and tear on parts such as the motor, suspension system, and drum.
Over time, this can reduce the lifespan of the washer and result in costly repairs or the need for a replacement.
Water Leakage
An unlevel washer may cause water to leak from the washing machine. When the washer is not level, the water inside the drum can become unevenly distributed.
This can lead to water spilling over the sides or accumulating in areas where it shouldn’t, causing leaks. Water leakage can damage the flooring, surrounding cabinets, or nearby electrical components, posing a safety risk.
To prevent these problems and ensure the proper functioning of the washer, it is essential to level the machine during installation and periodically check its level.
By maintaining a level position, you can minimize noise, vibrations, and potential damage, and maximize the efficiency and longevity of your washing machine.